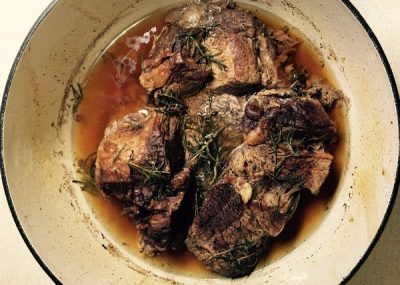
Enjoy this non-recipe – recipe! My amounts are not really measured so I’m kinda guessing here. But it was too good not to share!
This simple braised beef is a go-to in our house. It’s really easy, really flavorful, and is oh-so comforting on a cold evening! I really like using chuck roasts for these but you could use any kind of roast you’d like.
In fact, braising is great because you can use the cheaper, tougher cuts of meat like chuck, round, brisket, or short ribs and get more delicious bang for your buck. The combination of low temperature cooking and moist (ew) heat turns the toughness of
the muscle and sinew into delightfully tender meat and really tasty (and so good for you!) broth.
If you can, look for grass-fed beef because you’ll be getting much higher amounts of heart-healthy omega-3 fats as well as CLA, another fatty acid shown to help people lose fat as well as quite possibly be protective against cancer. When you choose grass-fed beef you can feel good about eating all the delicious fattiness of those cheaper cuts because you know you’re getting nourishing, good-for-you fat. It’ll help fill you up and you won’t need to eat as much, and it’ll last longer!
INGREDIENTS: really, I didn’t measure, and neither should you. Just throw the stuff in there and let the magic happen!
- 1 chuck roast. This was probably 2-3lbs
- ghee or other fat for browning
- 3-5 garlic cloves (the more the merrier)
- bunch of fresh rosemary and thyme (whatever you have or like works!)
- a decent sized glug of red wine – told you this wasn’t a real recipe (or just use broth)
- Beef broth or water (enough to just barely cover the meat)
- unrefined sea salt and pepper to taste
PREPARATION INSTRUCTIONS:
Season the meat with salt and pepper. Use unrefined sea salt. It’s good for you! Don’t be shy about salting the meat. We want flavor here, people. Preheat the oven to 300. Heat a large dutch oven or other oven safe pot on medium-medium high and put in a little ghee (or whatever). While that heats, smash up your garlic cloves and let them sit for 10 minutes or so. The active compound in garlic that makes it so good for you actually takes 10 minutes or so to be activated after garlic is cut. Once it’s heated it can’t be activated anymore so get the most out of your garlic by chopping and then letting it sit!
Anyway, once the pot is nice and hot sear the meat on all sides. I think I did 3-4 minutes per side. You want to get a nice brown on there. Things may get a little messy and a little spattery. Or maybe that’s just when I do it.
When the meat is all browned take it out of the pot. Get all the brown bits of flavor off the bottom by dumping in the wine or whatever liquid you have. Vinegar, broth, water, beer, whatevah. Deglaze the pan and scrape up all those bits. Add in the garlic, put the meat back in, add broth or water to just barely cover it (I don’t even fully cover it with liquid half the time) and throw in your herbs.
Bring the liquid to a simmer and then cover with a tight fitting lid and put in the oven. Let that baby go for 2-3 hours depending on the size of the roast (or cut it in a few pieces in the beginning) and then serve with whatever veggies you fancy. Or, for a one pot deal, add the veggies to the pot about halfway through. Check to make sure there is enough liquid and add more if needed!

here is noticeably a bunch to know about this. I assume you made various nice points in features also.